

One Chassis, Three Vehicles: A Magnetic Tile Redesign Challenge
Back to Journal News

YRZtiles 106 piece magnetic tile car chassis builds: Set up a small redesign workshop
When one child wants a vehicle, another child wants "the good wheels," and dinner is quietly getting closer, a huge floor-spanning build is not always the answer. A smaller challenge can be more satisfying: make one vehicle, remember it, take it apart, and give the same base a completely new job.
That is the charm of the YRZtiles 106pcs STEM Magnetic Tiles and Building Blocks. The activity begins with the single wheeled chassis included in the 106-piece set. It does not become three vehicles at once. Instead, it becomes a Delivery Van, then a Fire Engine, then a Mobile Shop.
Think of it as a redesign relay. The goal is not to preserve every build forever, although a particularly excellent lopsided roof may deserve a photo. The goal is to notice how a few colorful geometric pieces can change the vehicle's job, shape, and story.
Claim a modest build zone: a placemat-sized section of table, a tray, or a clear corner of the rug. Pull out a small working selection of square, rectangular, triangular, open-frame, door, and window-style pieces. The rest can remain nearby until needed. This keeps the table from looking like a tiny tile tornado before the first vehicle even leaves the garage.
If siblings are sharing, give each person a role. One can choose the vehicle job, one can find pieces, one can call out the route, and one can be the official photographer. Rotate who gets to move the finished vehicle. Suddenly, one chassis is not a problem. It is the whole premise.
Ages 3+. Follow the current product label and instructions.
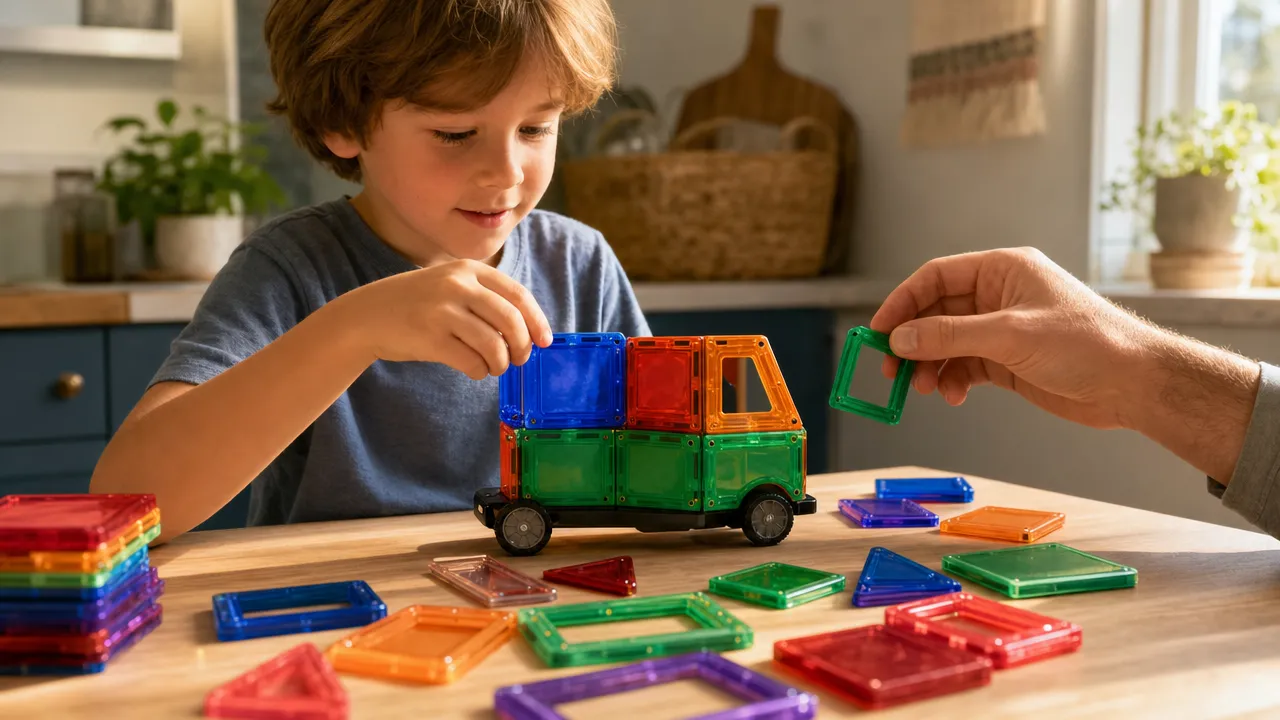
Start low and test early
To build magnetic tile car with one chassis, begin with the body rather than the decorations. Put the chassis in the middle of the work area, choose which end will be the front, and add a low layer of tiles around or above it.
After each layer, pause and try a gentle hand roll or push in the cleared zone. You are simply checking whether the body stays together as a play structure. There is no need to test speed, steering, or how much it can carry. A short, careful roll is plenty.
Keep a phone nearby for photos, or use a scrap of paper for a quick memory sketch. That small record makes it easier to take the build apart without an emotional emergency halfway to dinner.
Keep the challenge focused
This article intentionally sticks to exactly three redesigns. Searches for a magnetic tile cargo truck chassis build, magnetic tile excavator model 106 piece set, magnetic tile school bus chassis activity, or magnetic tile ambulance and clinic build can inspire future play, but they are not extra vehicles for this sequence.
Today, the same chassis gets three jobs only: deliver, respond, and open for business.
First redesign: Build a compact delivery van
A Delivery Van is a friendly place to start because it can be low, boxy, and immediately recognizable. It does not need a towering roof, dozens of details, or a perfectly matched pair of pieces. The basic idea is simple: a driver area at one end and a parcel area at the other.
Build the low, boxy body
Choose one end of the chassis as the front. Add a square, rectangle, open-frame piece, or window-style piece to suggest the driver's view. At the opposite end, create a compact rear section with a few squares or rectangles. Keep the body close to the chassis rather than stacking upward too quickly.
If a child reaches for a triangle, try it as a small angled roofline detail. If the triangle makes the vehicle look like it is wearing a party hat, that is not a problem. It may simply be the fastest delivery van in the neighborhood.
Build in short steps:
- Add a low front cue for the cab.
- Make the rear section slightly more box-like.
- Add one small roof or side detail only if the body feels balanced.
- Give it a gentle hand test.
- Remove the tallest piece first if the body starts to lean.
If you run low on the original pieces you imagined using, redesign the job instead of hunting for an exact replacement. An open-frame piece can become a window. An open rear can become a quick-load parcel area. A smaller body can become a neighborhood van that handles only very important deliveries, such as one paper note addressed to the sofa.
Play a short delivery sequence
For a magnetic tile delivery van sequencing game, make two or three optional paper stops from scrap paper. "Book stack," "cushion corner," and "kitchen chair" are enough. These route cards are optional household props, not included with the set.
Let one child call the stop while another gently moves the van. If the route suddenly visits the sofa twice, the driver is apparently very committed to customer service.
Before moving on, take one photo or make a quick sketch. Then remove the tiles from the Delivery Van body while keeping the chassis ready. This moment matters: the van is complete, remembered, and now available to become something new.
Second redesign: Create a fire engine and short route
Now reuse the same chassis for a Fire Engine. The key difference is not a literal ladder or a complicated rescue setup. Instead, make the body look like it has a cab at the front and a wider-looking service section toward the back.
This is where children often discover that changing one side or one top detail can completely change the story. A van with a wider rear and a tiny roof marker suddenly has somewhere important to be.
Change the shape, not the chassis
Begin with a low front cab. A window-style or open-frame piece can make the front visually distinct. Behind it, use squares or rectangles to create a broader, low rear body.
Add one modest triangular or open-frame detail on top only after the main body feels settled. Keep it short and centered. A long unsupported arrangement may pull sideways, especially if it is perched on a narrow section.
If the structure leans, try these adjustments:
| What is happening | What to try instead |
|---|---|
| The top detail pulls to one side | Remove it, then replace it with a lower centered piece |
| The rear looks too tall | Take off one layer and keep the service area wide |
| A connection does not sit as expected | Turn the piece, move it to another spot, or choose a different shape with the same visual role |
| The cab is not obvious | Use one contrasting piece or one open space to mark the front |
There is no prize for arguing with a stubborn roof tile. A shorter Fire Engine still looks ready for a call.
Run one tiny route activity
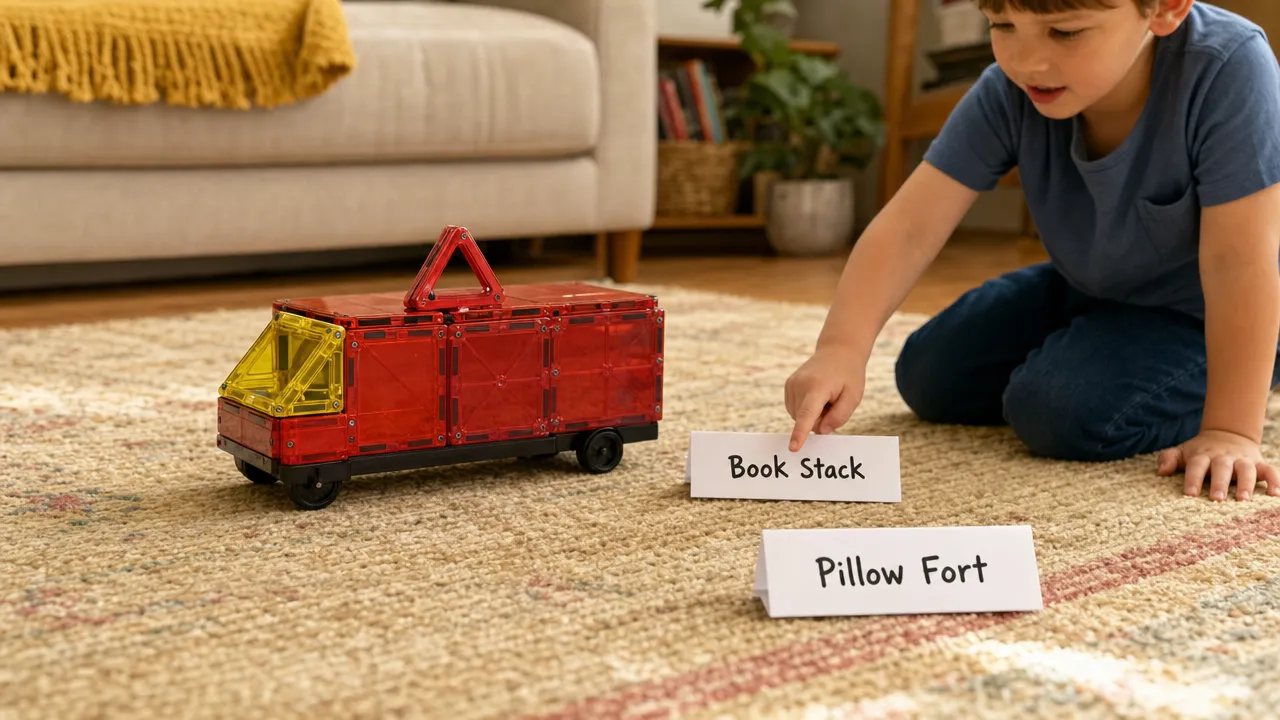
A magnetic tile fire engine route activity can be as small as two folded paper cards on the rug. Write a simple prompt on each: "Check the pillow fort" or "Visit the book stack." These are optional household props, not included with the set.
One child can announce the call. Another can move the vehicle. A third can decide what happened when the Fire Engine arrives. Maybe the book stack is fine. Maybe the stuffed animals have formed a committee. Let the story stay pleasantly ridiculous.
Take a picture or make another quick drawing before dismantling the Fire Engine body. The single wheeled chassis is now ready for its last redesign. There should still be only one completed vehicle at any point in this challenge.
Third redesign: Open a mobile shop
The final version is a Mobile Shop. This build is especially useful when everyone has a different idea about what the vehicle sells. It can be a pretend flower cart, book cart, snack cart, pet-supply cart, or something nobody has named before. Let the name arrive after the build.
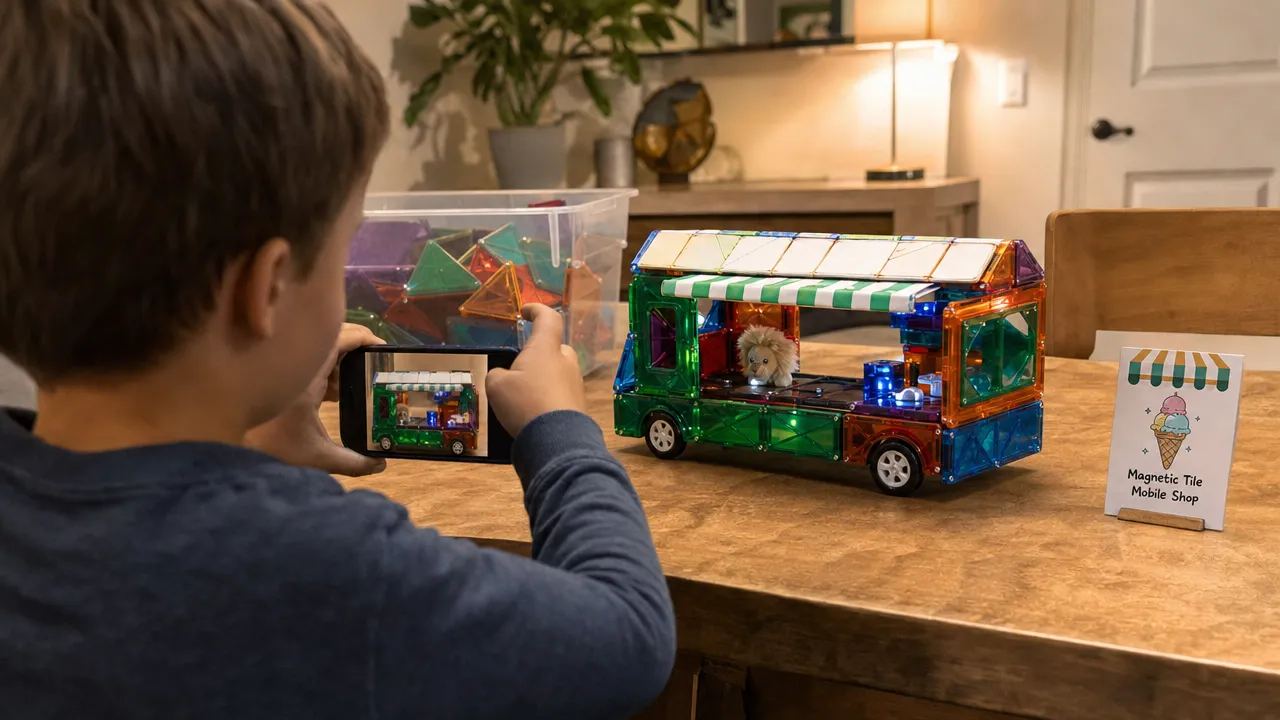
A magnetic tile mobile shop chassis does not need a heavy roof or a complicated counter. Its identity comes from one open side that suggests, "Hello, we are open."
Build an open side, not a giant structure
Start with a short, low body around the same chassis. Choose one side to become the serving side. Use an available window-style, door, or open-frame piece to create that open visual cue.
Keep the counter side near the middle of the body. Add a light roofline only if it stays centered. If an awning begins leaning like it has had a very long day, take it off. A roofless shop is simply enjoying excellent ventilation.
Try this flexible build order:
- Make a low body with squares or rectangles.
- Pick a serving side.
- Add an open-frame, door, or window-style piece.
- Test the build gently.
- Add one small triangle only if the roofline needs a finishing touch.
- Name the shop when the shape is complete.
If a window-style piece is already being used elsewhere, leave one side partially open. If the shop begins to resemble a bus, van, or strange rolling greenhouse, let the child rename it. The redesign still works because the chassis has received a new job.
Give the shop one final stop
Add a paper sign, a tiny paper menu, or a pretend parcel if your household already has suitable items. These are optional household props, not included with the set. The shop needs only one stop before cleanup.
Perhaps it serves imaginary smoothies at the end of the table. Perhaps it sells books to a plush customer. Perhaps it makes an unscheduled detour toward the sofa because the sofa has been declared downtown.
Take one final photo or sketch. It is a small ritual, but it tells children that taking a build apart does not erase the idea. It makes room for the next one.
When the plan gets wobbly, redesign it
Real-life building is rarely a straight line. Pieces get used in another structure. A sibling suddenly needs the blue square. The roof falls off during the grand reveal. None of that means the activity has gone wrong.
Use these quick resets:
- If the build leans: Remove the tallest piece first. Lower the roofline and center the remaining pieces.
- If a connection feels awkward: Turn the piece, relocate it, or give another shape the same job. A window can become an open frame. A missing roof can become an open-air design.
- If pieces are running low: Shorten the body instead of forcing a larger plan. The vehicle's role matters more than matching a picture.
- If the build falls during play: Rescue the chassis, rebuild only the loose section, and continue. A smaller rebuild is still a rebuild.
- If the plan changes halfway through: Follow the new idea when practical. A Delivery Van can become a Fire Engine early, and a Mobile Shop can turn into whatever the builder decides it is.
This is also helpful for families looking for one chassis three magnetic tile vehicles without needing three separate bases. The sequence is the activity: build, test, remember, disassemble, redesign.
Reset the set before the next adventure
After the Mobile Shop makes its final stop, return the tiles to their usual storage spot and place the single wheeled chassis with them. Paper route cards can be saved for another day or recycled. One child can gather squares, another can collect triangles, and an adult can do the final sweep for the one tile that always seems to roll under the chair.
The best part of this challenge is that it fits real family time. You can complete all three vehicles in one play session, or stop after the Delivery Van and continue another day. Each redesign has a beginning, a small test, a story, and a clean ending.
When you are ready for another build-and-rebuild afternoon, explore the YRZtiles 106pcs STEM Magnetic Tiles and Building Blocks and browse more YRZtiles building ideas.
Comments
No comments yet. Be the first!