

How to Make a Floor-Level Magnetic Tile Road Map for the YRZtiles Car
Back to Journal News

If the YRZtiles car has spent the morning circling a chair leg and parking under a sock, it may be ready for a road map of its own. The good news: this town does not need zoning meetings, asphalt, or half the living room. A small patch of floor can hold a loop, a parking spot, and a few make-believe stops - and still disappear before dinner.
For this activity, use the single wheeled chassis included in the YRZtiles 106pcs STEM Magnetic Tiles and Building Blocks set. Lay the route flat, keep it clear of family walkways, and let your child decide whether the pretend bakery belongs beside the parking bay or, for reasons known only to the mayor, next to the sofa. The plan is meant to change as play unfolds. Start compact, test the route with the chassis, and adjust one section at a time until the little town is easy to drive, share, and tidy away.
Choose a small floor zone for your magnetic tile road map
Start by choosing a flat patch of floor that sits beside the room's usual traffic path, not across it. Think of the build as a small play island. You want enough room to reach each side of the loop without stepping over it, but not so much space that the road quietly expands into a cross-country expedition.
A corner beside the sofa, a clear spot near a wall, or a section of floor close to the storage container can work well. If the road begins touring the sofa, that is your cue to make it smaller, not to declare the project defeated.
The 106-piece set is designated for Ages 3+. Follow the current product label and instructions as you prepare the activity.
Before building, gather only the pieces that have a job:
| Piece type | Helpful job in the road map |
|---|---|
| Squares and rectangles | Outline the loop, mark parking, make low walls |
| Triangles | Create a turn marker, simple roof, or visual landmark |
| Open-frame pieces | Form a low parking entrance or drive-through stop |
| Door pieces | Suggest an entrance to a shop or station |
| Window-style pieces | Help one pretend stop look different from another |
Keep the single wheeled chassis nearby, but do not place it on the route yet. First, make the map easy to read. A vehicle needs a destination, after all, even if that destination turns out to be an imaginary snack shop with a very lopsided roof.
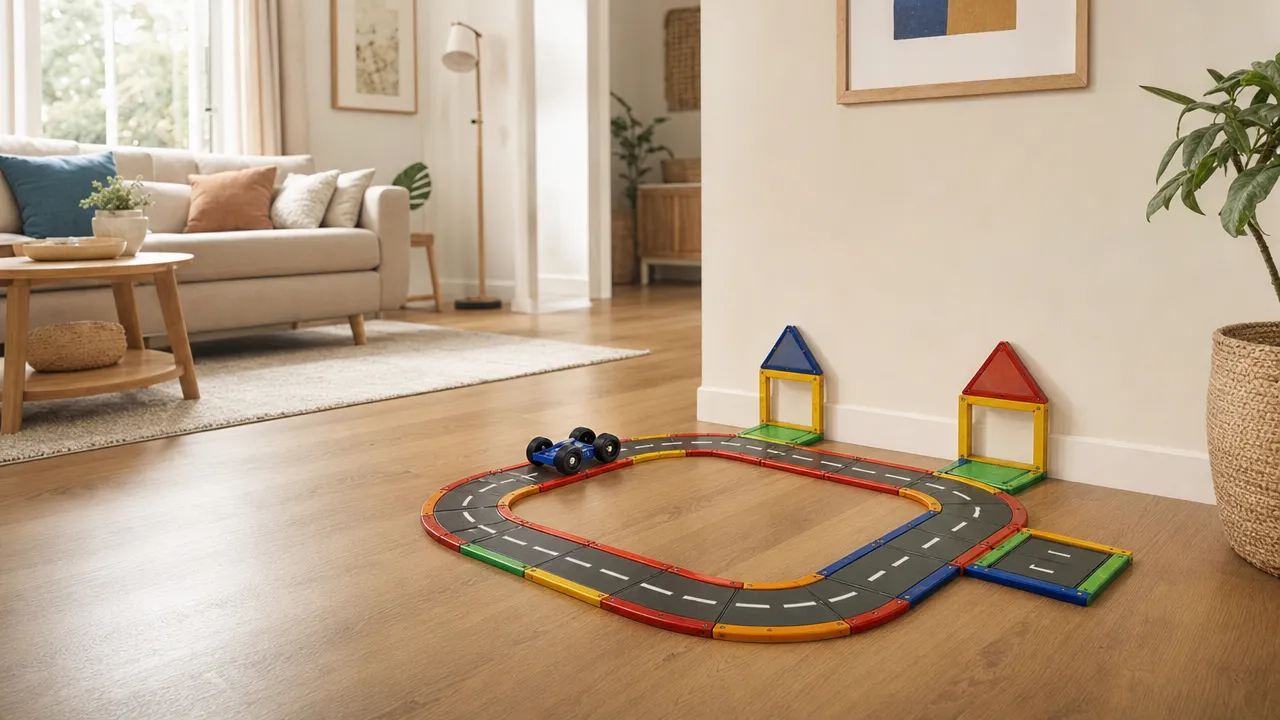
Keep the road flat before adding details
Lay tiles flat on the floor or use low edge-to-edge tile sections to visually define the route. The tiles do not need to act like specialty road pieces. They simply show where the vehicle travels, turns, pauses, and returns.
A small loop is easier to test than a long road. It also gives the single chassis a clear return path, which is useful when a sibling wants a turn or dinner is approaching faster than expected.
Build a loop and parking area with one chassis
Begin with the loop, not the buildings. Arrange squares and rectangles into a rounded rectangle, a loose oval, or an uneven boxy circuit. The shape does not need to be perfect. It only needs to look like a route with a beginning that leads back to itself.
Once the loop is visible, create a parking area beside it. Make this parking bay a side space rather than part of the driving path. That small distinction prevents the whole route from becoming one long traffic jam, which is impressive realism but not always the kind families are hoping for.
Try this compact order:
- Make a closed floor-level loop.
- Leave one side of the loop visually open or wide enough to suggest an entrance into parking.
- Outline a small parking bay with a few tiles beside the loop.
- Add one open-frame piece or a low pair of tiles as a parking entrance.
- Save remaining pieces for stops and landmarks.
If you want to build magnetic tile car with one chassis, let the chassis remain the one moving part of the activity. The road map does not require several vehicles to feel lively. One vehicle can park, deliver, visit, turn around, and start a new job on the next lap.

There is no prize for using every available tile. In fact, leaving a few pieces unused can make the whole activity calmer. When pieces run low, protect the essentials first: keep the loop, keep the parking area, and reduce the number of stops.
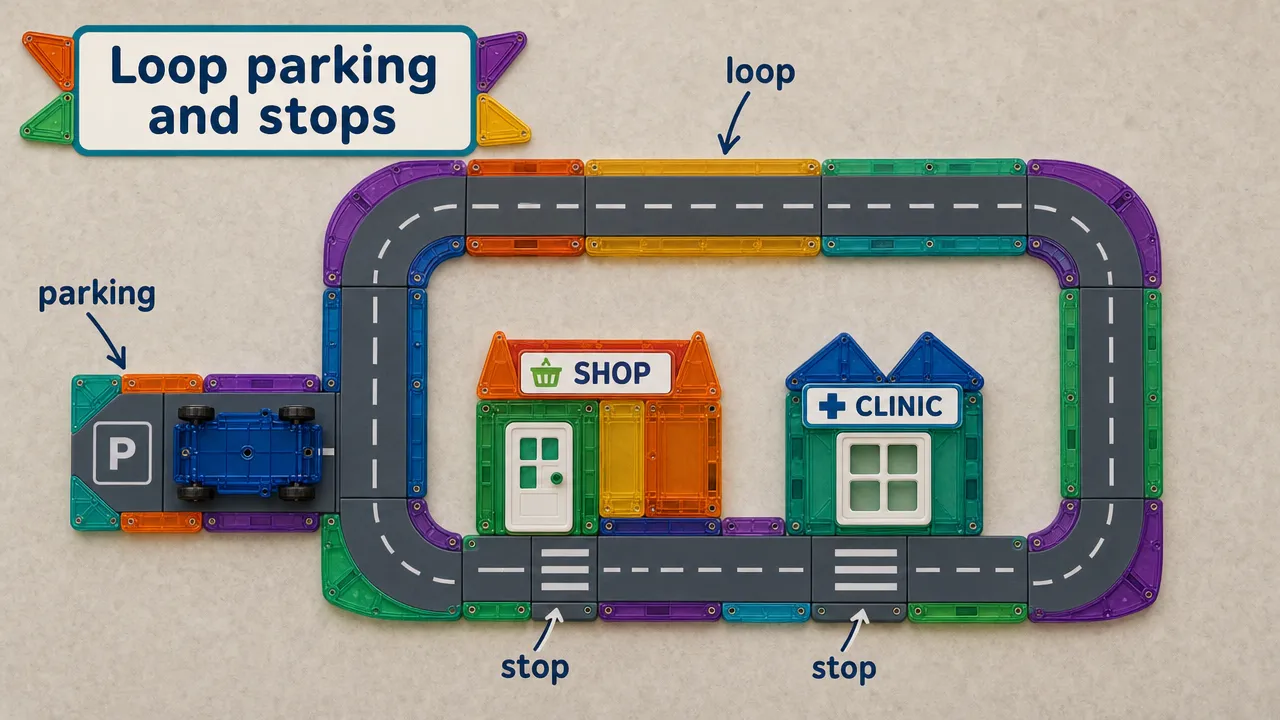
Add magnetic tile stops without building a whole city
Two or three stops are enough. Each stop can be a low tile front, a doorway, a window, or a tiny roof marker. The point is not to make a complete building. The point is to give the driver a reason to leave parking and make another lap.
A door piece can become a shop entrance. A window-style piece can become a clinic front. A triangle above a low wall can mark a school stop, a station, or a place where the driver is absolutely certain there are imaginary cookies.
Build each stop beside the loop, not in the middle of it. Keep structures low and broad. A flat storefront often works better than a tall tower that leans toward the road like it is trying to flag down the chassis.
Simple stop ideas for a short play session
| Pretend stop | Quick tile treatment | Vehicle prompt |
|---|---|---|
| Shop | Door piece with two low side walls | Park and restock the shelves |
| Clinic | Window-style front and a small roof | Deliver a helper to the clinic |
| School stop | Triangle marker above a low wall | Pick up and return to parking |
| Fire station check-in | Wide opening made with an open-frame piece | Visit, turn around, and head home |
| Delivery point | One small tile facade beside parking | Drop off a pretend parcel |
Paper signs, route cards, toy figures, pretend parcels, books, play food, and tape are optional household additions and are not included with the set. A folded scrap of paper labeled "shop" is more than enough if your child wants labels. If not, the window piece can be a clinic one minute and a bakery the next.
This is also where a magnetic tile ambulance and clinic build can become a quick role-play prompt. The same single chassis can temporarily be the clinic helper for one lap, then return to parking before taking on another role. Likewise, a magnetic tile school bus chassis activity can be as simple as driving from the school stop back to the parking bay.
Test the magnetic tile road map with car chassis
Now place the single wheeled chassis included in the 106-piece set onto the route. Take one slow test lap together. Pause at each stop. Pull into the parking area. Back out, if that is part of the story. Then look at the map rather than judging it.
Ask a few practical questions:
- Is the loop easy to recognize?
- Does the parking area feel separate from the route?
- Is a stop crowding a turn?
- Has the outer edge drifted toward a household walkway?
- Would one fewer stop make the route easier to use?
A magnetic tile road map with car chassis does not need to perform like a miniature city plan. It needs to give the child a visible route and a few decisions to make. "Do I park first or deliver first?" is enough plot for a ten-minute after-school session.
If siblings are sharing, try a simple division of jobs. One child drives the chassis to the next stop. The other child changes one feature of that stop, perhaps turning the shop into a clinic or moving the parking entrance. Then switch. This keeps one chassis at the center of play without asking anyone to wait through a lengthy building meeting.
A magnetic tile delivery van sequencing game works especially well here. Use optional paper route cards marked first, next, and last. The chassis travels to each stop in order, returns to parking, and then the route cards can be shuffled for another round.
Adjust YRZtiles 106 piece magnetic tile car chassis builds when plans change
Rebuilding is not a rescue mission. It is the next move.
If a stop leans or falls, make it shorter, widen the base, or turn it into a flat storefront. A one-story shop still sells imaginary snacks. If a connection does not sit as expected, try the same pieces in a simpler line, change the direction of the stop, or use fewer connections.
If available pieces no longer match the original plan, keep the loop and parking bay. Then combine two stops into one shared neighborhood building. A shop and clinic can share a wall. A window piece can become a sign rather than part of a larger facade. The map does not need every idea at once.
| If this happens | Try this instead |
|---|---|
| A stop leans toward the route | Lower it, widen it, or remove an upper layer |
| The loop feels crowded | Remove one turn or one stop |
| Pieces run short | Keep the loop and parking, then combine stops |
| The route reaches a walkway | Move the outer edge inward and reconnect the smallest loop |
| Cleanup is close | Choose one final destination, park, and begin the reset |
This guide is designed for one route and one vehicle, not a one chassis three magnetic tile vehicles display. It is also not a magnetic tile cargo truck chassis build or a magnetic tile excavator model 106 piece set project. Those can be fun ideas for separate sessions, but here the charm is in letting one chassis change jobs on a contained map.
For example, the same vehicle can become a delivery van, then a school shuttle, then part of a magnetic tile fire engine route activity. It is never three completed vehicles at the same time. It is one reliable traveler with a very flexible résumé.
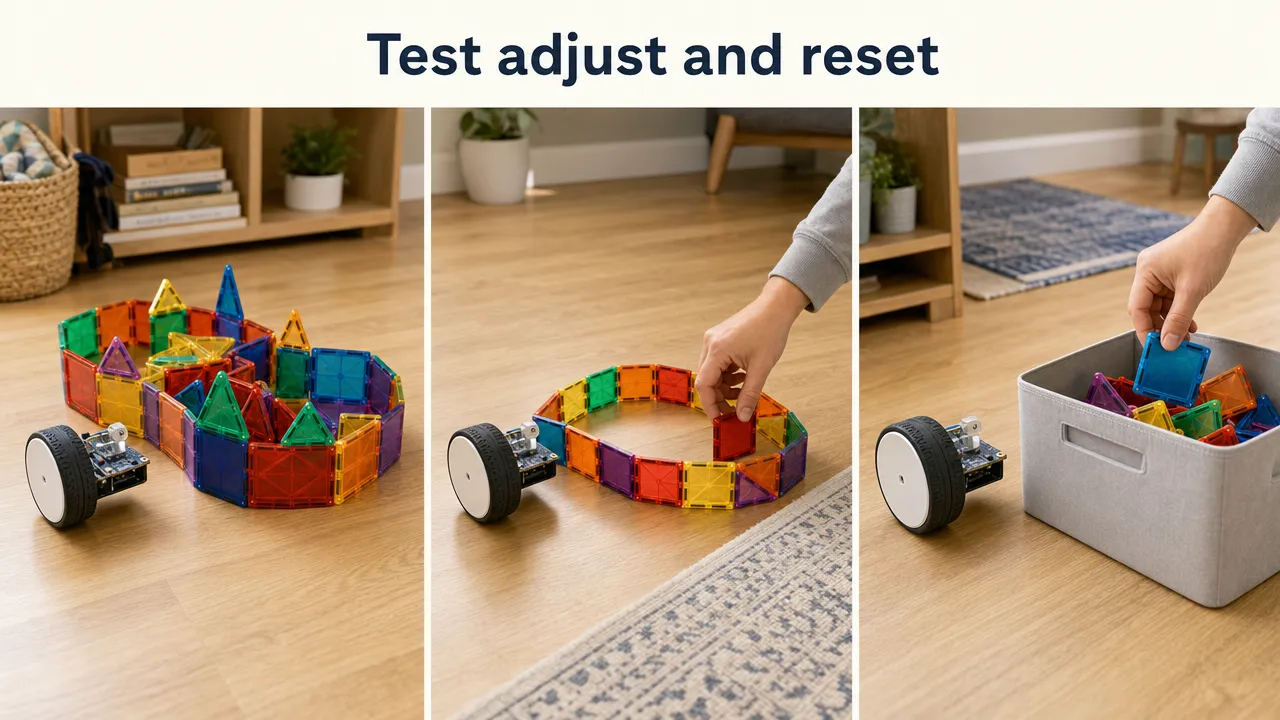
Give the vehicle a different job each lap
A magnetic tile mobile shop chassis prompt can be as simple as parking at two stops to restock them. On the next lap, the shop closes and the same chassis becomes a school shuttle. Change the story, not the number of vehicles.
You can also make a short "park, deliver, return" round when time is tight. There is no need to stretch the game into a major production. Children are perfectly capable of changing the plan halfway through, usually just after you have decided the layout is finished.
Reset the route before dinner or bedtime
End with one last lap. Pick a final destination, park the chassis in its bay, and remove any optional household props first. Then return the tiles to the storage container in broad groups rather than attempting a museum-style inventory.
Squares with squares, triangles with triangles, and everything else that needs a home can go into the same nearby bin. The floor path returns, the room feels like a room again, and tomorrow's route can become something completely different.
A small loop, one parking spot, and a few pretend stops are enough for a satisfying play session. If you would like the set used for this activity, you can view the current 106-piece set listing and instructions.
Comments
No comments yet. Be the first!