

How to Build a Simple Magnetic Tile Car with the YRZtiles Chassis
A wheeled base has a way of becoming the most interesting piece in the box, especially when a child finds it five minutes before dinner. Fortunately, a first car does not need a towering roof, matching doors, or a family-sized construction zone. A low body, a few well-chosen tiles, and a short stretch of clear floor are enough.
The YRZtiles 106pcs STEM Magnetic Tiles and Building Blocks set includes one wheeled chassis. This activity uses that single chassis to make one simple car at a time. The goal is not to copy a real vehicle perfectly. It is to build a recognizable little car, give it a gentle roll, notice what shifts, and make a calmer second version if the first one wobbles.
That makes this a useful after-school or weekend project: there is a clear beginning, plenty of room for a child's choices, and an ending that does not require closing a miniature auto factory.
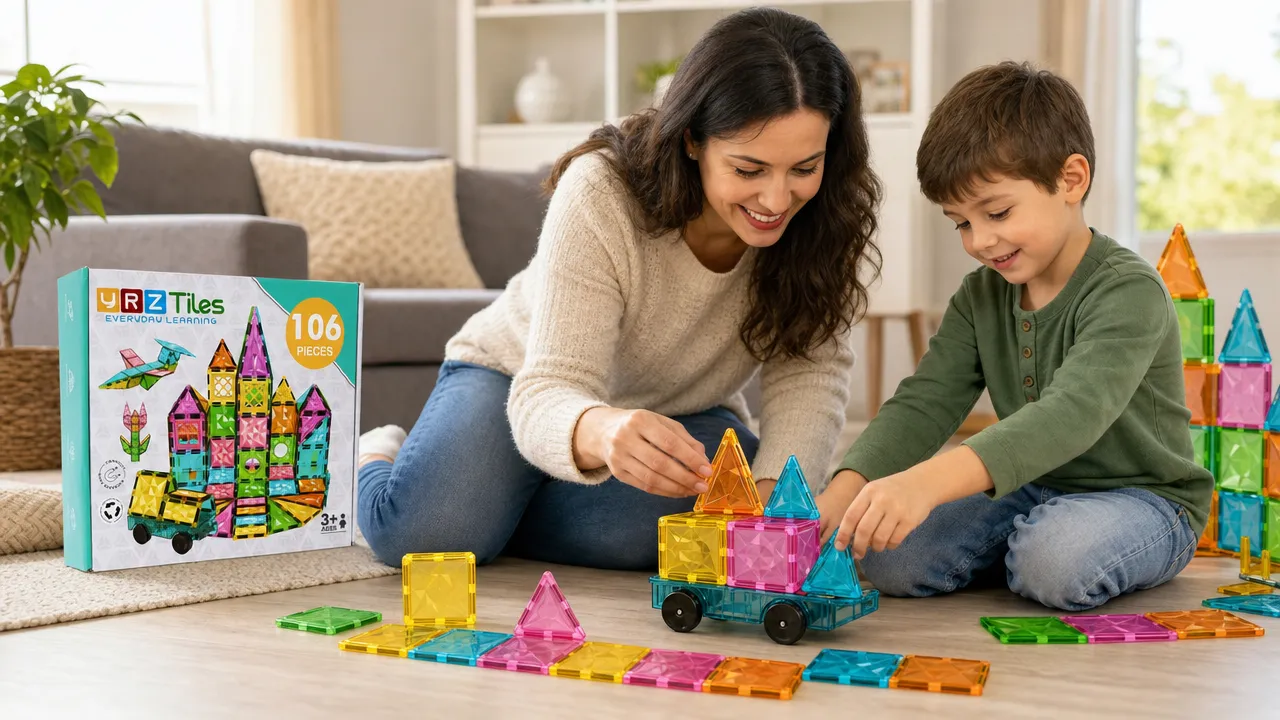
Make a small build zone before choosing pieces
Start with the space your family has today. A clear table works well for building, while a firm patch of floor gives the car room for a short roll later. If you are using a rug, keep a nearby hard, flat surface available for the test. You need only a path about as long as a child's reach, not a racetrack through the hallway.
Set out:
- The single wheeled chassis.
- A small group of squares and rectangles for the body.
- One or two triangles for a front, roof, or side detail.
- A few spare tiles for a parking place or destination.
- A container for the pieces you are not using yet.
Keeping most of the set in the container makes the choices easier to see. It also leaves room for hands, elbows, and the snack plate that inevitably joins the design meeting.
Optional paper signs, a pencil, a shallow sorting tray, or a toy figure can add to the story, but they are household extras and are not included with the set. Place loose props beside the car rather than loading them onto it.
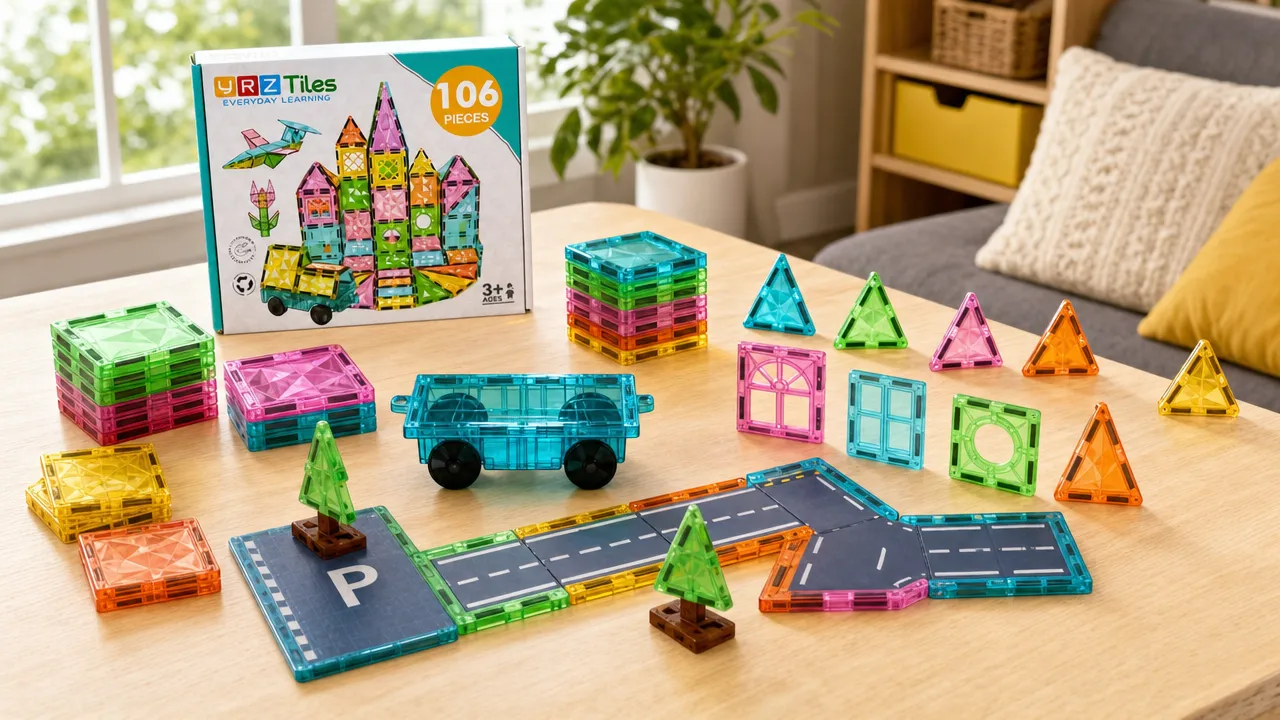
Give siblings different jobs
One chassis does not have to mean one child gets all the fun. One builder can choose the first two body pieces while another makes a flat parking spot. After the first roll, switch jobs: the route maker becomes the car designer, and the first builder decides where the car is going.
Useful prompts are simple:
- Which end should be the front?
- Should the car be open on top or have a small roof?
- Which piece can we remove if it feels too tall?
- Where should it park when the trip is over?
There is no need to quiz a child about shapes. This is play, not a surprise oral exam delivered by a rectangle.
Build the body low and add details slowly
Put the chassis in the middle of the build zone and decide which end will be the front. A child may choose the end nearest a favorite color, the window, or the kitchen. All three are valid design systems.
1. Begin with a short lower body
Add a few squares or rectangles close to the chassis, following the way the pieces settle and connect. Work from the bottom up. A low first layer gives the car a clear outline without committing the family to a tall structure that needs constant repair.
Pause after the first two or three pieces. Look from the side rather than immediately filling every opening. If it already looks like a car to the builder, the basic body is doing its job.
2. Mark the front
Choose one square, rectangle, or triangle to suggest a hood or windshield area. This is a visual cue, not a functional steering section. The chassis does not become motorized or steerable because the front looks fast, no matter how confidently its designer announces otherwise.
If the front feels crowded, remove a piece. A clear, simple shape is easier to recognize than five details competing for the same small space.
3. Add one side at a time
Try a square or rectangle on one side, then turn the car and look at the other side. The sides may match, but they do not have to. A child might prefer one window-like detail, one triangle, or a color pattern that makes sense only to the driver. That is fine.
The useful question is not "Is it symmetrical?" but "Does anything look loose, overly tall, or hard to reach?" Make one adjustment before adding another piece.
4. Decide whether the car needs a roof
An open-top car is finished if the child says it is. If a roof sounds fun, use a modest arrangement and keep it close to the body. Stop adding height when the car starts to feel fussy to move.
A roof that leans on the first try is not a crisis. It is the build politely suggesting a redesign.
5. Save a few tiles for the scene
Place two rectangles flat as a short road or use four squares to outline a parking bay. One door-frame or window-style piece can suggest a garage entrance if your child wants one. These scene pieces give the car a destination without making the vehicle itself more complicated.
Give the car a gentle roll test
Before moving it, clear loose tiles, paper, and small household objects from the path. Set the car at one end and give the chassis a gentle hand push. This is an observation, not a speed trial and not a test of how much the model can carry.
Watch the tile body rather than the finish line. Did a roof piece shift? Does one tall side lean? Is the car awkward to hold because there are too many decorations near the top? A short roll can reveal which part of the design wants attention.
If the car wobbles or a piece falls, keep the chassis in place and revise one thing:
| What you notice | A simple change to try |
|---|---|
| The roof shifts | Remove it or replace it with a lower detail. |
| One side looks crowded | Return one decorative tile to the pile. |
| The body feels too tall | Keep the lowest layer and rebuild upward with fewer pieces. |
| The car catches a route marker | Lay the marker flat or widen the path. |
| A piece will not sit comfortably | Try a different shape rather than forcing it. |
| The second builder wants a turn | Let that child choose the single next revision. |
Then roll the new version over the same short path. Comparing two small versions is more useful than rebuilding the entire car after every wobble. It also gives children a natural way to say, "I liked the first roof better," and try again.
Keep the test gentle. Do not sit or stand on the model, send it down stairs, add heavy objects, or treat it as a ride-on toy. No load, speed, or steering performance is implied here; it is a magnetic-tile model for floor or tabletop play.
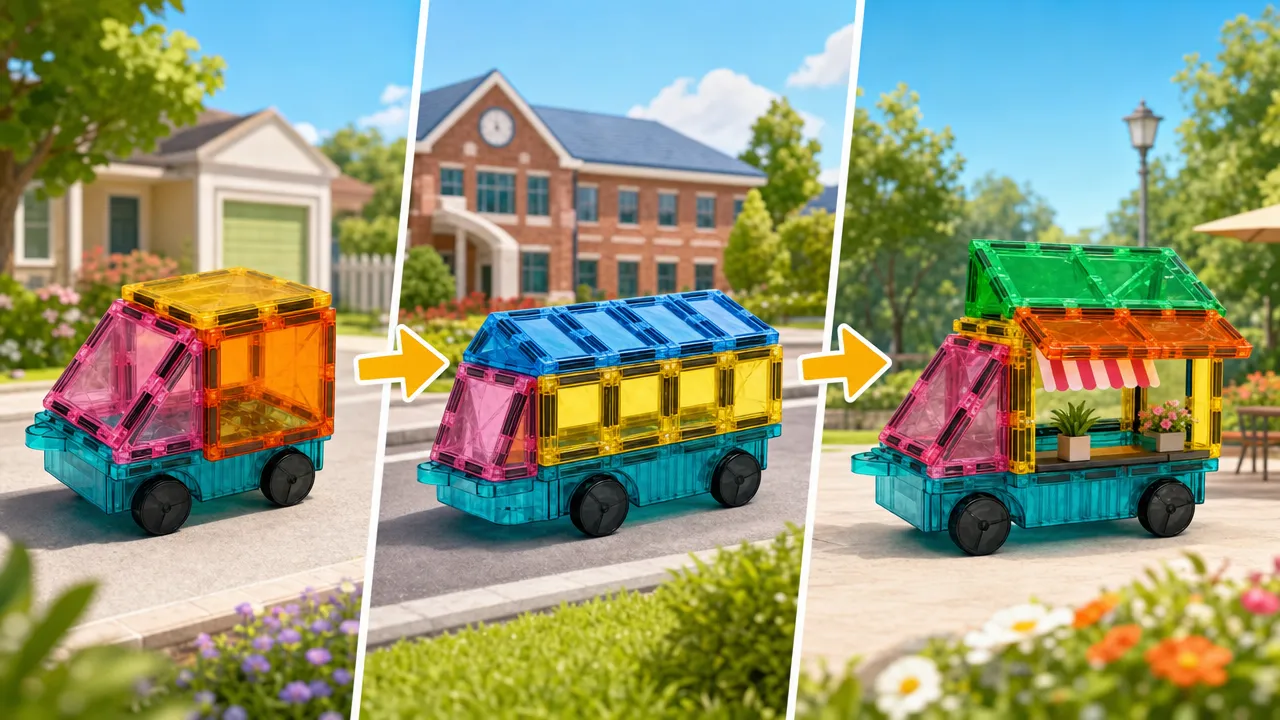
Turn the finished car into a short family story
Once the car can travel through the little play area, give it one job. A focused story usually lasts longer than a pile of unrelated instructions.
Make a three-stop trip
Set out three flat tiles or optional paper cards as stops. They might be Home, Park, and Bakery. Move the car from one to the next, then return it to the parking bay. A child can change the order halfway through; local traffic planning is famously unpredictable.
For a short after-school session, make only two stops. For a slower weekend build, add a low garage or a gate with spare tiles. Keep raised structures away from the rolling path so the car has room to pass.
Open a tiny repair shop
If a piece shifts during the trip, park the car and let the child be the repair planner. Ask which one piece should move, come off, or change places. Another family member can hold the spare-piece tray and offer two options rather than rummaging through the whole set.
This keeps a collapse from ending the story. The repair becomes part of it, and no one has to pretend that a loose roof was part of the original plan.
Play with one child without directing every choice
Sit nearby and narrate only what you can see: "The front is low," or "That triangle changed the side." Avoid declaring that a particular piece is correct. When the child changes the car into something unexpected, follow the new idea. A first car can become a snack-delivery vehicle, a pet taxi, or an unnamed machine whose only assignment is visiting the sofa.
Share one chassis without a timer
For siblings who dislike timed turns, use trip-based turns instead. One child builds and drives the route once. Then park the car, change one or two pieces, and let the next child plan the return trip. The vehicle stays whole long enough to feel satisfying, but control still moves between players.
Fit the activity into the time you have
Not every build needs the same ending. Match the plan to the household schedule.
For ten minutes: Make a low open car, roll it once, and park it between two flat tiles.
For a half hour: Add a three-stop route, revise one wobble, and switch sibling roles after each trip.
For a weekend session: Build a small garage beside the route and photograph the finished scene before taking it apart. A photo is optional, of course; the family phone is not part of the set.
If dinner arrives earlier than expected, stop after any complete step. A body without a roof is still a car. A route with one destination is still a route. Ending while the activity is going well is often easier than extending it until every available tile has applied for a job.
Park, sort, and inspect before putting the set away
Give cleanup a place in the story. Drive the car into its parking bay, remove any optional household props, and gather flat route tiles first. Take the body apart over the play area so pieces do not scatter. Find the single chassis and return it to its storage spot before sorting the remaining tiles into broad groups such as squares, rectangles, triangles, and specialty pieces.
If the child wants to remember the design, take a quick picture before disassembly. Then ask for one small cleanup job: collect the road pieces, check under the table, or place triangles in the container. Specific jobs work better than the majestic but vague instruction "Clean everything."
Ages 3+. An adult should inspect pieces before play. Stop using any cracked, separated, or damaged piece, or any piece with an exposed or missing magnet. Keep magnet-containing pieces away from younger children. If magnet ingestion is suspected, seek immediate medical attention. The U.S. Consumer Product Safety Commission's magnet safety guidance provides additional information for families.
The first car does not need to be the biggest or most polished build in the room. If a child can recognize it, change it after a wobble, take it on a short trip, and help park the pieces afterward, the little car has done plenty.