

How to Use the Magnetic Tile Window and Door Pieces in the YRZtiles 106-Piece Set
If you are checking the documented inventory before building a house, garage, station, or castle, the official inventory image for the YRZtiles 106pcs STEM Magnetic Tiles and Building Blocks shows window-style tiles, open square and door-frame pieces, double-door panels, specialty connector or fence pieces, and one wheeled chassis.
This guide applies only to the 106-piece Classic magnetic tile set. It does not apply to the separate MagFlake product line, which uses a different hybrid system and has a separate inventory.
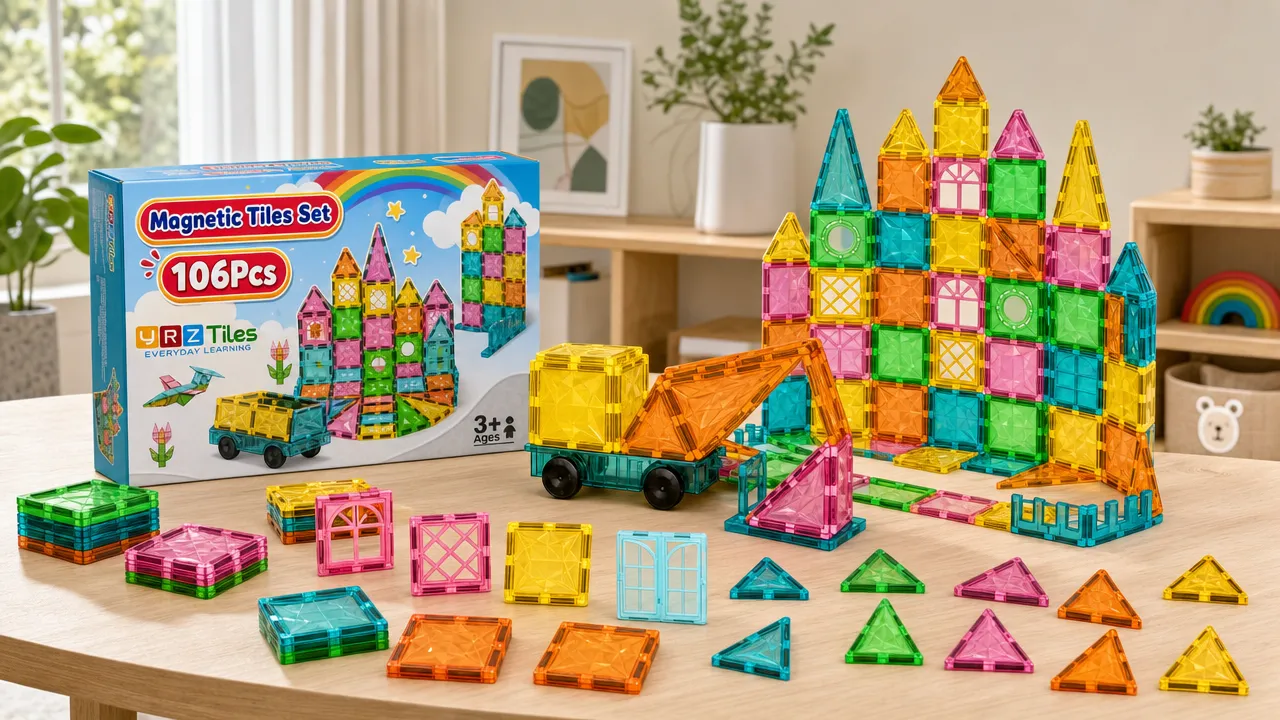
Window, door, and frame pieces in the 106-piece Classic set
The official inventory image documents 106 total pieces in this Classic set. The architectural pieces support openings, entrances, window details, gates, and vehicle-focused play layouts.
| Documented piece type | Count | Practical use |
|---|---|---|
| Standard squares | 30 | Floors, walls, and side sections |
| Equilateral triangles | 20 | Roofs, gables, and tower tops |
| Right triangles | 15 | Sloped sections and angled details |
| Long or acute triangles | 10 | Roof lines and tall details |
| Rectangles | 10 | Wall extensions, counters, and spans |
| Open square or door-frame pieces | 6 | Doorways, gates, pass-throughs, and service openings |
| Double-door panels | 4 | Visual entrance details |
| Round-window squares | 2 | Lookouts, portholes, and display windows |
| Arched-window squares | 2 | Tower, station, school, or castle details |
| Lattice-window squares | 2 | House, shop, and community-building details |
| Specialty connector or fence pieces | 4 | Optional boundary or connector details |
| Wheeled chassis | 1 | Vehicle builds and clearance tests |
The four smallest specialty pieces are described conservatively as specialty connector or fence pieces because their exact functional name is not clear in the inventory image.
The double-door panels should be treated as visual door details. Do not assume that they hinge, open, close, lock, or latch.
Build around a window or door opening
Use window and door magnetic tile pieces by planning the opening first. Build the surrounding walls only after the opening has a defined location.
Plan the opening before building upward
Choose one role for the opening:
- Front entrance
- Garage bay
- Castle gate
- School entry
- Clinic reception window
- Station ticket window
- Market-stall serving window
Lay out a low floor shape with standard squares. Leave a deliberate gap where the architectural piece will go. A planned gap prevents the need to remove part of a completed wall later.
Place an open square or door-frame piece where a character, vehicle, or pretend customer needs to pass through. Place a window-style square where the structure needs an exterior detail.
Place the architectural piece and build around it
Attach surrounding squares or rectangles on the sides of the opening. Add tiles gradually. Keep the first wall low until the opening remains in the intended position.
Use triangles only after the wall layout is working. A triangle can create a roofline, gable, or tower top, but it does not provide a guaranteed structural result.
Try this sequence:
- Build a low floor or base outline.
- Reserve the doorway, gate, or window location.
- Add one open frame, door panel, or window square.
- Attach wall tiles to each side.
- Add a second row only if the layout remains in the desired shape.
- Add roof or tower details last.
Test gently and revise the layout
Test the completed low build on a flat surface. Touch the sidewalls lightly and observe whether the opening shifts.
If the wall shifts, use one of these changes:
- Widen the base.
- Reduce the wall height.
- Move the opening closer to the center.
- Replace a tall roof arrangement with a lower one.
- Change the position of nearby squares, rectangles, or triangles.
Do not force pieces into a configuration that does not connect naturally. Testing and revising is a practical way to adjust the build without assuming a fixed stability level.
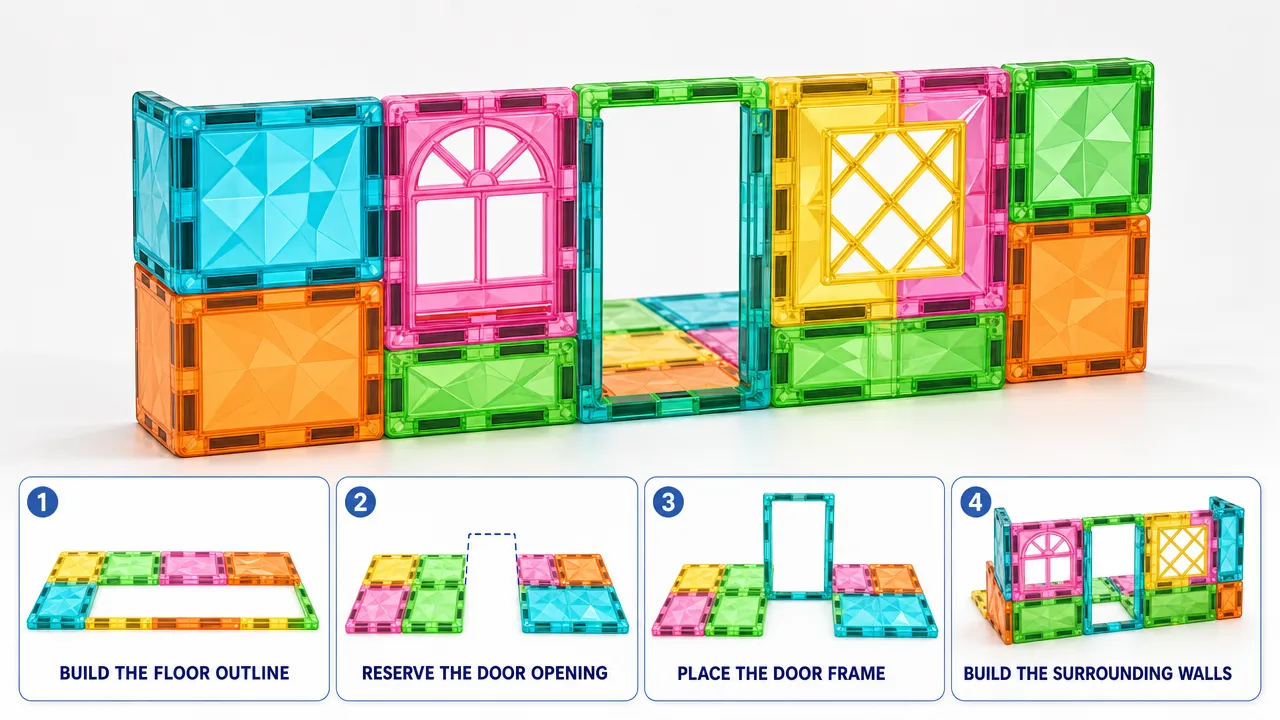
Five settings for pretend play
These community-building prompts are flexible play ideas. They are not fixed manufacturer model instructions.
House and home entrance
Use an open frame as a front entry. Place a lattice-window square beside the entry and add a round or arched window higher on the wall.
Use a double-door panel as a visual front-door detail. Add triangles after the main wall shape is complete to try a roof.
Optional and not included: paper family drawings, a paper mailbox, cardboard signs, and toy figures.
Try a simple market stall
For a simple market stall, build a low counter shape with an open frame facing outward. Treat the frame as a service window where one player takes an order and another player receives pretend items.
A rectangle can be tried as a low counter or awning detail if it connects naturally in the selected layout. Add a lattice-window square as a shop display detail. Use a double-door panel as the visual entrance.
Optional and not included: paper price tags, paper menus, pretend coins, toy food, clean reusable containers, and small toy figures.
School, clinic, library, or community center
Use a double-door panel to mark the main entrance. Place an open frame at a separate wall section for a reception desk, check-in point, or library return window.
Assign a simple purpose to each opening:
| Building | Opening role | Window detail |
|---|---|---|
| School | Student entrance | Classroom window |
| Clinic | Check-in point | Waiting-room window |
| Library | Return desk | Reading-room window |
| Station | Ticket window | Control-room window |
| Shop | Customer entrance | Display window |
The specialty connector or fence pieces can be placed near the structure as a boundary detail. Do not assign a more specific function to these pieces.
Try a castle gate or tower window
Castle window designs can use the documented arched, round, and lattice-window squares without treating them as official castle-only pieces.
Build a low castle front with two side sections. Leave a gap in the center for an open frame or a double-door panel. Use the center feature as a visual gate.
Place arched-window squares in the tower sections for a traditional window shape. Place round-window squares higher on a wall for a lookout or decorative tower detail. Use lattice-window squares for a courtyard-facing wall or palace section.
Use triangles only after the tower base is stable in its current arrangement. Try different roof shapes, then reduce the height or change the tile layout if a tower does not remain upright.
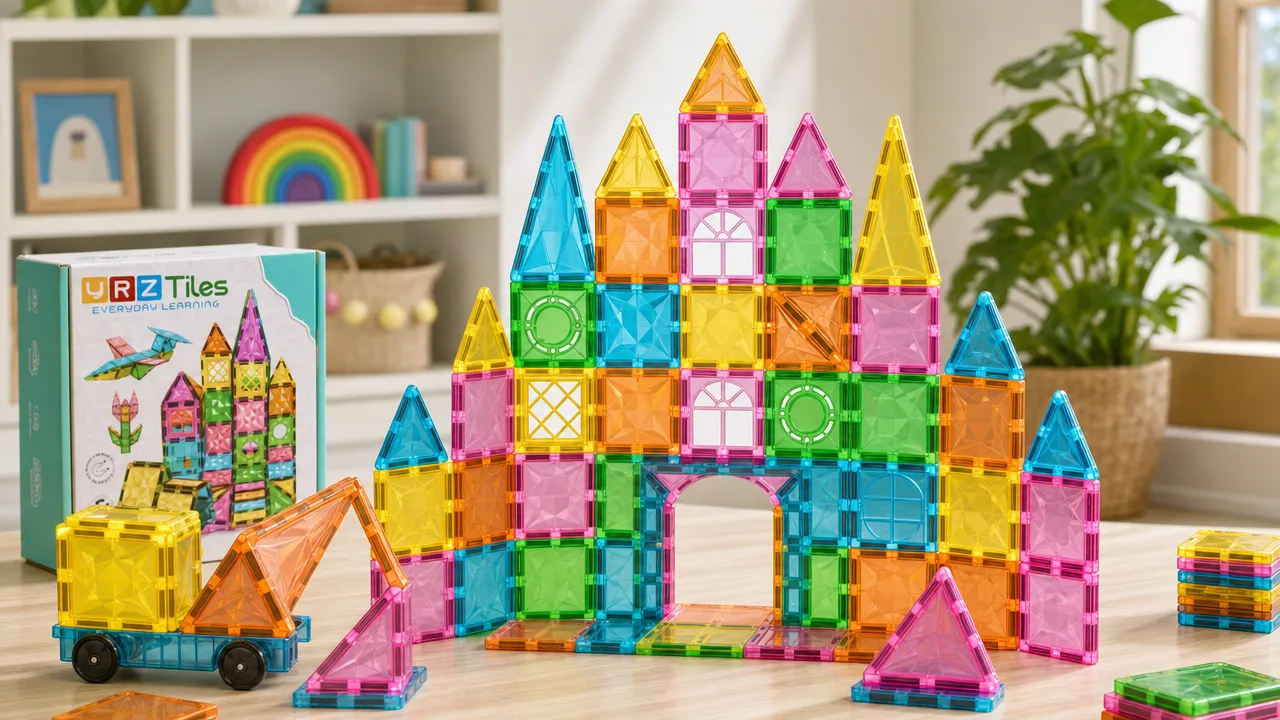
Use the single chassis in a garage or station scene
The official 106-piece inventory image documents one wheeled chassis. Use it as a vehicle-focused building prompt or as a physical guide when planning an opening.
Start a garage or station build by placing the chassis on the play surface. Build the walls around the route the chassis needs to follow. Do not close the opening until you have checked the route.
Use an open frame as a garage entrance, repair bay, station doorway, or ticket window. Use a double-door panel as a visual entrance detail. Window-style squares can represent a station office or garage control room.
Check an opening without a published measurement
No published dimension is available for a garage-style opening, door-frame opening, or chassis route in this set. Do not rely on a numerical estimate.
Use this non-numeric test-and-adjust method:
- Put the included wheeled chassis on a flat surface.
- Build a low opening with two side supports.
- Roll the chassis slowly toward the opening.
- Observe contact with the sidewalls or top section.
- Move the supports, change the top-piece arrangement, or revise the route if contact occurs.
- Repeat the test until the chassis can move through the layout you built.
This procedure tests your own build arrangement. It does not establish a universal clearance measurement.
Test a bridge route gently
Use the same gentle test for a bridge route. Build two low supports and add a top section only when the pieces connect naturally.
Roll the chassis slowly beneath the opening. If it touches the bridge, move the supports farther apart, lower the route, or rebuild the top section.
Do not place books, cups, body weight, or heavy objects on the bridge. Do not treat a bridge build as load-bearing.
For product details and the current set listing, review the YRZtiles 106pcs STEM Magnetic Tiles and Building Blocks. The YRZ Classic magnetic tile collection lists the separate Classic set sizes. The full YRZtiles product collection also lists the separate MagFlake line, which should not be mixed with Classic-set features.
Safety and cleanup
Current official packaging imagery indicates Ages 3+.
Safety note: Inspect pieces before play. Stop using cracked or separated pieces, or any piece with an exposed or missing magnet. Keep magnet-containing pieces away from younger children. Seek immediate medical attention if magnet ingestion is suspected.
The U.S. Consumer Product Safety Commission magnet safety guidance and HealthyChildren magnet safety guidance both emphasize prompt medical action when magnet ingestion is suspected.
The documented inventory supports practical building with six open frames, four double-door panels, six window-style squares, four specialty connector or fence pieces, and one wheeled chassis. Plan the opening first, build around it, test the layout gently, and revise the structure for the house, market stall, school, clinic, castle gate, station, garage, or bridge scene you want to create.