

How to Build a Magnetic Tile Market Stall for Pretend Play
A family market can open with a sensible plan to sell apples and, five minutes later, be offering paper muffins, invisible soup, and one leaf that costs forty dollars. The inventory may be unpredictable, but the build itself can stay simple.
This project creates a low, stationary counter with a small canopy or sign area. It uses architecture pieces from the YRZtiles 106pcs STEM Magnetic Tiles and Building Blocks, plus optional paper props from home. No chassis is used. The stall stays in one place on the floor or table, so it remains clearly different from a vehicle-based mobile shop.
The best version is easy for children to reach from both sides, simple to revise, and small enough to close before bedtime. It does not need four walls, a full roof, or every tile in the box.
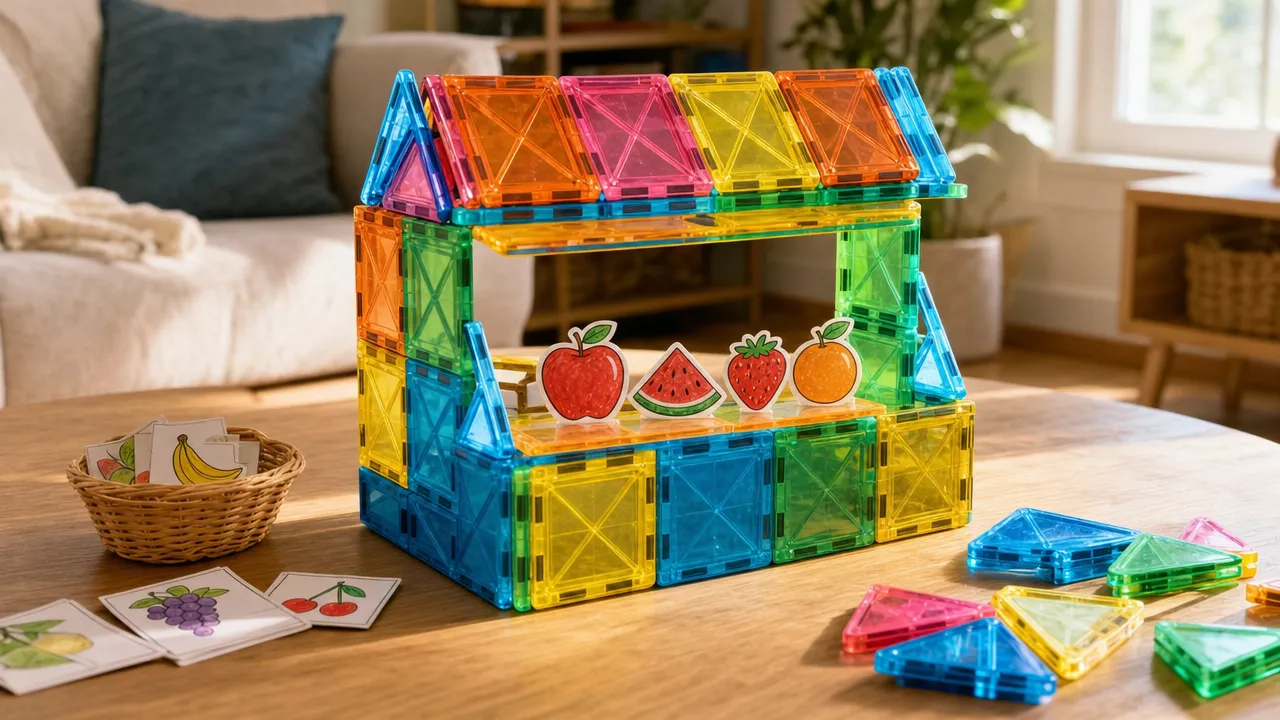
Choose a spot and pull a small working set
Start on a clear, flat floor or sturdy table. Leave room on one side for the shopkeeper and on the other for customers. A counter pressed against a wall may look tidy, but it often gives one child all the access and the other child a fine view of somebody's elbow.
Set aside a practical group of pieces:
- Standard squares for the counter front and short sides
- A few rectangles for a wider panel, display surface, or sign backing
- Several triangles for an optional canopy accent
- One open frame, door-style piece, or window square as the stall's visual feature
- A few extra squares for revisions
Leave the wheeled chassis and unrelated pieces in the storage area. This build is a fixed market stall, not a cart, van, or moving shop.
Optional paper product cards, price signs, pretend money, play food, baskets, toy figures, crayons, trays, and notepads can be useful later. None of those household props are included with the set. Keep them off the work surface until the counter is finished; otherwise, the paper apples tend to occupy the exact spot where a wall needs to go.
Build the counter before the canopy
The counter is the working center of the stall. Build it low enough for children to reach across without leaning on the tiles.
- Make a broad front. Connect a short row of squares or rectangles on the flat surface. Aim for a counter that looks wide rather than tall.
- Add two short returns. Attach one or two panels at each end so the front becomes a shallow U shape. These side pieces mark the shopkeeper's space without enclosing it.
- Leave the back open. The shopkeeper should be able to move paper cards or figures without reaching over a wall.
- Choose a service point. Use an open frame, window square, or a clear gap to show where customers place an order.
- Try a reach check. Have the child reach from the shopkeeper side to the service point with an empty hand. If a wall gets bumped, shorten or rotate it.
- Add one display area. A rectangle laid flat inside the stall can suggest a shelf or display surface. It remains part of the play scene and should not hold drinks, books, or body weight.
- Stop and use the counter. Before building upward, pretend to complete one simple order. If both sides are accessible, the most important part already works.
Add a small canopy or sign area
Choose one upper feature, not three. A little restraint keeps the counter reachable and leaves pieces for repairs.
Option A: A low canopy accent
Add two upright side pieces behind the counter, then place a small triangle arrangement between or above them if the pieces connect comfortably. Keep the feature shallow and easy to remove. It should suggest an awning, not cover the entire customer area.
Look at the build from the side. If the upper pieces lean into the counter, remove one layer or replace the canopy with a flat sign panel. Do not force connections or promise that one arrangement will stay together under active play.
Option B: A simple sign backdrop
Stand a rectangle, square, or open frame behind one side of the counter. This creates a clear place for the market name without putting a roof over children's hands. An optional paper sign can lean against the backdrop. The paper sign is not included and does not need to be taped to a tile.
Whichever option the child chooses, keep the structure low and stationary. Do not turn the counter into a ride-on object, carry it while assembled, or use it to support household items.
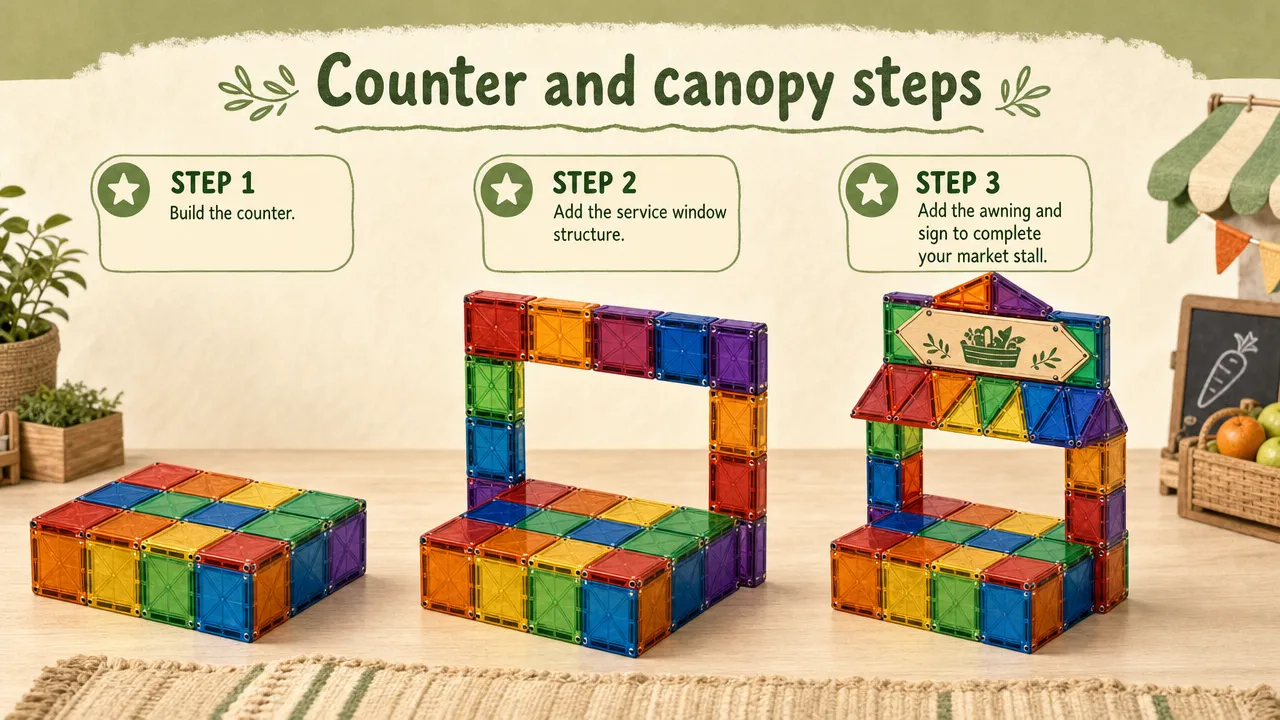
Test the parts children touch during play
Play testing does not require measurements or performance claims. It simply checks whether the family's particular arrangement is comfortable to use.
Try four quick checks:
- Counter check: Lightly touch the front where a customer would place an order. If panels separate immediately, shorten the front or reconnect it on the flat surface.
- Reach check: Move an empty hand from the shopkeeper side to the display. If the canopy or side wall gets bumped, open the layout.
- View check: Sit at the child's height and see whether the service point and sign are visible.
- Prop check: Place one lightweight paper card on the display. If the counter becomes crowded, use fewer cards rather than making the stall larger.
Change one part at a time, then repeat the relevant check. Moving every wall at once makes it hard for a child to see why the new version works better.
When something falls, name the visible problem: "The left side moved when your hand reached in." Then offer two possible changes, such as shortening or turning that side.
Let one architecture piece set the market's mood
Window and door-style pieces can provide a theme without adding more walls.
| Feature piece | Stationary stall idea |
|---|---|
| Open frame | Order window or pickup opening |
| Double-door panel | Decorative backdrop behind the shopkeeper |
| Round-window square | Cookie or cafe display |
| Arched-window square | Flower or produce-market detail |
| Lattice-style window | Garden-market backdrop |
| Small specialty or fence-style piece | Low queue marker or display boundary |
These are visual play suggestions, not mechanical functions. Keep the chosen feature where children can see it and where it will not block their hands.
The stall can change what it sells without becoming a different structure. Swap paper apple cards for flower cards, or change the market sign from "Fresh Food" to "Saturday Books." The same fixed counter, open back, and customer side remain in place. That continuity helps distinguish this project from a mobile shop or a completely different building.
Add optional products without creating clutter
Cut or draw a small number of paper product cards before play, or invite children to make them while another person builds. Three to six cards are usually enough for a short scene. More products can wait in an optional bowl or tray beside the stall rather than covering the counter.
Simple card ideas include:
- Apples, pears, bread, or cookies
- Flowers or seed packets
- Books or greeting cards
- An "Open" and "Closed" sign
- Two or three price dots or picture labels
Paper cards, crayons, scissors, pretend money, bowls, and trays are optional household supplies and are not included with the set. An adult should supervise any cutting and choose materials appropriate for the children involved. Do not use coins, loose magnets, or tiny objects as pretend money or products.
Keep the cards loose. They can sit on the display or lean against a backdrop without tape, clips, or adhesives. Cleanup is faster, and the tiles stay available for the next build.
Share the stall without sharing every job at once
A fixed counter naturally creates two sides, which is useful for sibling play. Start with one shopkeeper and one customer. Add other roles only if more children join.
| Role | What to do |
|---|---|
| Builder | Adjusts the counter, service point, and sign area |
| Shopkeeper | Displays a few cards and answers questions |
| Customer | Chooses one or two products and completes a pretend purchase |
| Sign maker | Draws the optional market name or "Open" sign |
| Stock helper | Keeps unused cards in the optional tray |
| Checker | Tries the reach and view checks after a revision |
Rotate roles after two customer turns or after one short round. A timer is optional; a simple rule such as "shopkeeper after the next customer" is often enough.
If two children both want to build, divide decisions rather than tiles. One chooses the counter shape; the other chooses the window or sign feature. Switch those decision roles if a rebuild is needed.
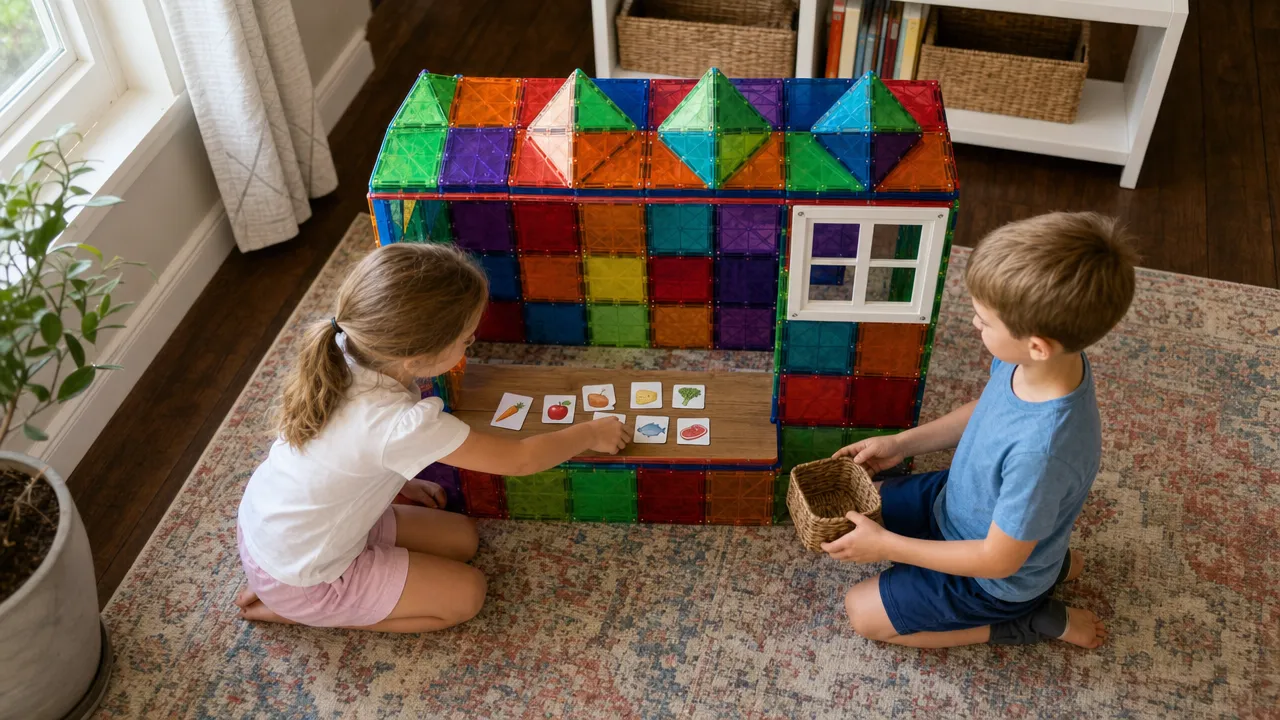
Try one short market-day story
Open the "Saturday Table Market" with three paper product cards: bread, apples, and flowers. These cards are optional and not included.
The shopkeeper places two cards on the display and keeps one behind the counter. A customer asks for apples, so the shopkeeper finds the hidden apple card, accepts optional pretend payment, and hands over the imaginary purchase. A second customer arrives before the optional sign turns from "Open" to "Closed." Then everyone swaps roles.
The scenario gives children a beginning, a small problem, and an ending without requiring the stall to travel anywhere. The humor comes from the conversation: perhaps bread is free on Tuesdays, or flowers may only be purchased by customers wearing socks. The rules can be odd; the counter stays put.
Fit the activity into an ordinary day
For a 15-minute after-school build, make the low counter, choose one feature piece, and complete one customer visit. Skip the canopy and use three paper cards at most.
For a small coffee table, use a straight counter instead of a U shape. Mark the shopkeeper side by placing the sign backdrop at one end. Keep the structure away from the table edge and remove drinks or snack plates from the play area.
When pieces run low, preserve the counter front and service point. Remove side panels or upper details. When attention runs low, declare closing time. A complete ending is often more satisfying than adding one last roof piece while everyone is already thinking about dinner.
Close the market and clean up safely
Make closing time part of the story. The shopkeeper turns the optional sign to "Closed," clears the display, and counts the remaining paper cards. Then the family resets the play area:
- Remove optional paper cards, signs, baskets, figures, and pretend money.
- Take down the canopy or sign backdrop first.
- Separate the short sides from the counter front.
- Group windows, doors, squares, rectangles, and triangles for storage.
- Check the floor and table edge for pieces that wandered away.
- Let an adult inspect the tiles before putting them away.
This is an Ages 3+ activity, and an adult should inspect all pieces before play. Stop using any cracked, separated, or damaged piece, including a piece with an exposed or missing magnet. Keep magnet-containing pieces away from younger children. If magnet ingestion is suspected, seek immediate medical attention. Caregivers can review the U.S. Consumer Product Safety Commission's magnet safety guidance.
A useful market stall does not need wheels, a full shop building, or a huge stockroom. Give children a low counter, an open side, and one clear feature. Then let the menu become gloriously unreasonable while the structure stays simple enough to use, revise, and pack away.