

Build a Magnetic Tile Cargo Truck with the 106-Piece Set
A cargo truck is a handy family build because the story starts before the last tile is in place. The cab needs a driver. The cargo area needs a delivery. Someone has already decided the sofa is a warehouse. All you need is a compact truck that can make the trip without becoming so tall that every turn requires a repair crew.
The YRZtiles 106pcs STEM Magnetic Tiles and Building Blocks set includes one wheeled chassis. This tutorial uses that chassis to make one truck with a low cab and a lightweight pretend cargo area. It is a model for gentle floor or tabletop play, not a vehicle for carrying a child, heavy objects, or liquids.
Children can help make practical choices: how high should the cab be, which side should stay open, and what can count as a parcel without asking the truck to do more than it should?
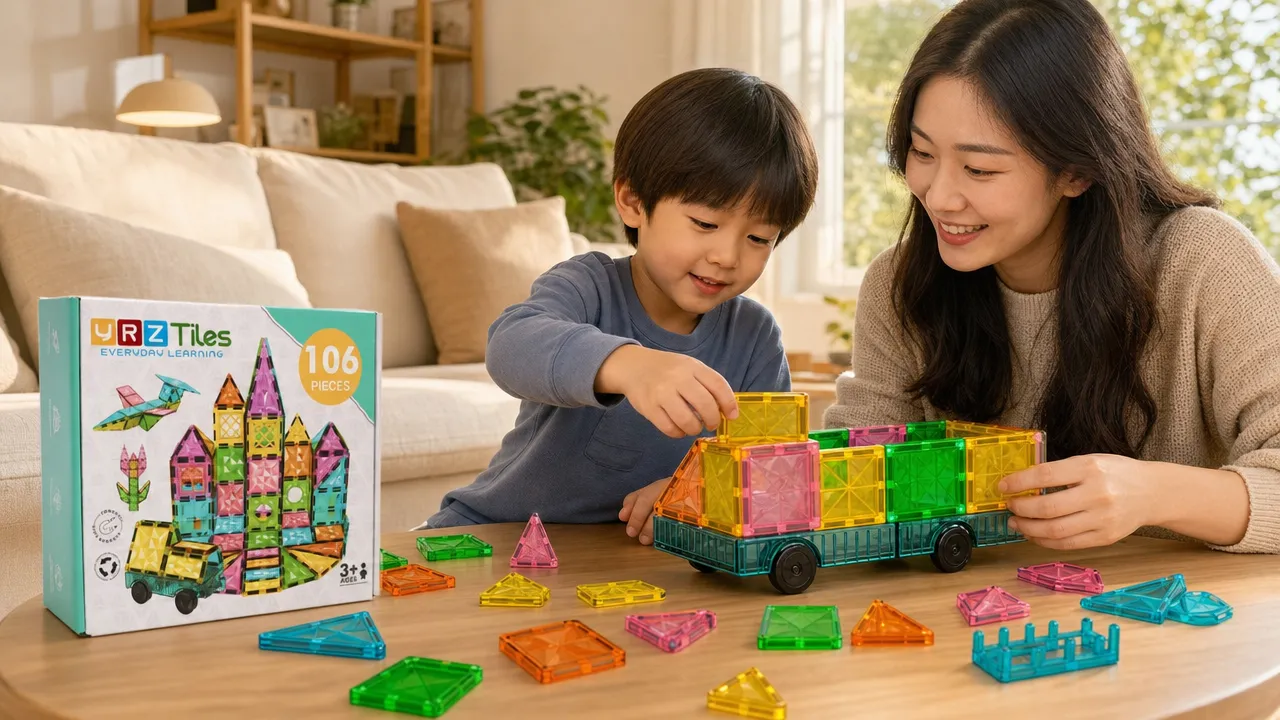
Plan the truck around one small delivery
Before opening the whole set across the floor, choose a delivery story. A narrow plan helps children decide which pieces matter and keeps the play area from expanding into every available room.
Try one of these simple jobs:
- Carry two empty folded-paper boxes from a tile depot to a paper-card shop.
- Deliver a few loosely crumpled paper balls to a pretend recycling center.
- Move a single light felt shape from one flat tile marker to another.
- Run an empty truck around three stops and invent the cargo in the story.
Paper boxes, paper balls, felt shapes, labels, tape, toy figures, and sorting trays are optional household items and are not included with the set. Keep every prop very light. Do not use coins, rocks, full containers, food, drinks, glass, batteries, or anything that could spill or strain the model. An empty cargo area is also perfectly good; imaginary bananas weigh exactly as much as the story requires.
Choose a contained work area
A clear tabletop is useful for building the cab and cargo walls. A firm patch of floor is better for the eventual route. If you are working on a rug, place flat tile stops nearby but do the gentle rolling check on a smoother, clear surface.
Gather only what you need at first:
- The single wheeled chassis.
- Several squares or rectangles for a low body and cargo sides.
- One window-style or open-frame piece if the child wants a cab detail.
- One or two triangles for a front or roof accent.
- A few spare tiles for a depot and delivery stop.
Leave the rest in a basket or box within reach. This creates a visible "parts shelf" instead of a floor-sized search puzzle.
Divide the jobs for shared play
With siblings, assign jobs that serve the same truck. One child can design the cab while another marks the depot with flat tiles. A third can prepare optional paper parcels. Switch after the first delivery instead of trying to create several wheeled trucks; the set has one chassis, so the shared vehicle is the center of the game.
Build the cab from the bottom up
Place the chassis in the center of the work area and choose the front. Keep the cab compact so the rear of the chassis remains visually available for the cargo section.
1. Make a low front body
Add a square or rectangle close to the chassis, following how the pieces naturally connect. Add a second piece only if it helps the front read as a cab. Look at the truck from the side before adding height.
A low cab is easier to revise and leaves more pieces for the cargo area. It also prevents the truck from looking like it is wearing a top hat to work, although a top-hat truck may deserve its own rainy-day session.
2. Suggest a windshield or front panel
Use a window-style piece, square, rectangle, or triangle as a visual front. It does not create a functional windshield, steering system, or driver's seat. The detail only needs to tell the child, "This end goes first in our story."
If a child wants a driver, a toy figure may stand beside the truck or at a route stop as an optional household prop. Do not wedge figures into the tile body or assume the cab is made to fit them.
3. Add a modest roof only if it helps
The cab can stay open. If a roof completes the look, add a low piece and give it a gentle touch to see whether it sits comfortably. A roof that keeps shifting can come off without changing the truck's job.
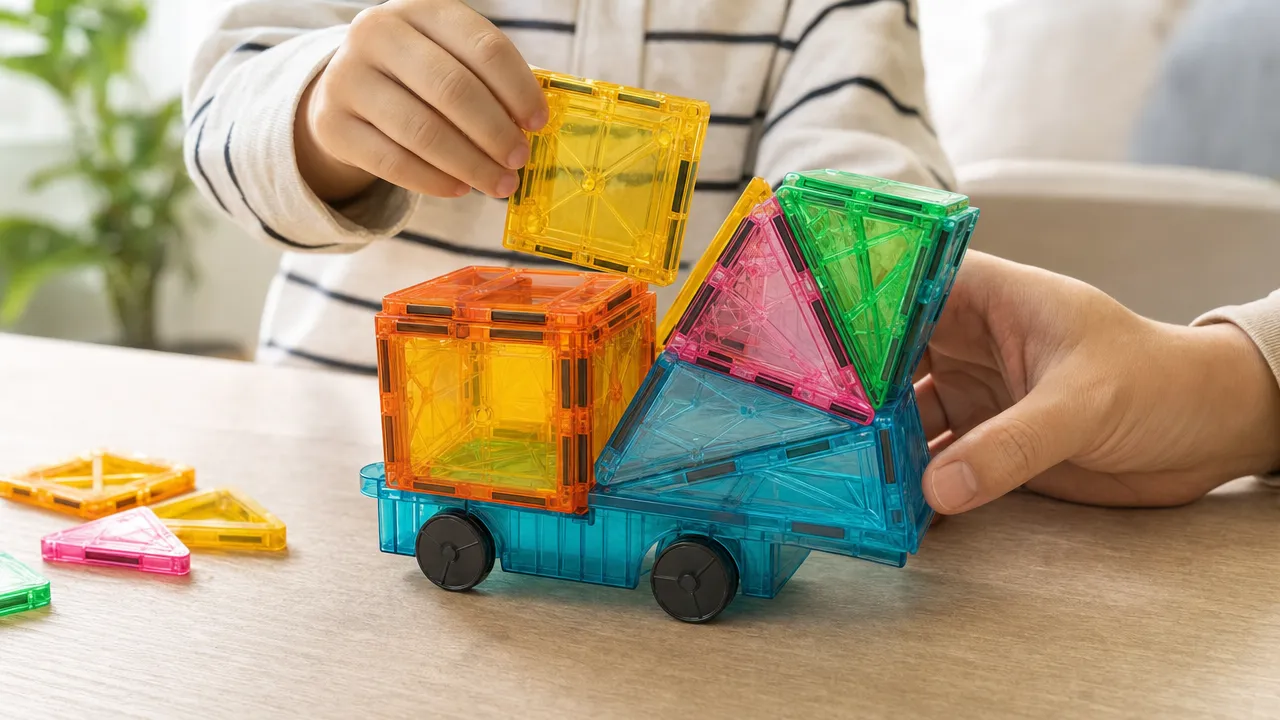
Shape a lightweight cargo area
The cargo section should look different from the cab. A lower open bed, two short side walls, or a box-like outline can all suggest a truck without creating a tall enclosure.
1. Mark the boundary behind the cab
Place one rectangle or a short row of squares behind the cab. This creates a clear beginning for the cargo area. Keep it close to the chassis instead of stacking a second story.
2. Choose an open or partly enclosed design
An open cargo bed uses fewer pieces and makes pretend parcels easy to place beside the truck during loading. A partly enclosed box can use low side pieces and an open back. There is no need to build four walls and a roof.
Try one of these approaches:
| Cargo-area idea | What to build | Why it suits family play |
|---|---|---|
| Open bed | A low base with two short side suggestions | Quick to rebuild when a side shifts |
| Side-wall box | Two low sides with the back open | Easy to see where pretend cargo belongs |
| Empty delivery body | A simple rectangular outline | Keeps the story focused without adding props |
The "cargo" is pretend first and physical second. If you add a prop, use only something light, dry, and easy to remove, such as an empty paper parcel. This activity makes no claim about how much the chassis or tile body can hold.
3. Leave a clear way to load and unload
Keep one side or the back open. Children can place an optional paper parcel in the area without pulling off a roof every time. If the opening makes a wall feel unstable, simplify the wall rather than adding more layers around it.
4. Check the side view
Set the truck down and look from a child's eye level. Can you distinguish the front cab from the lower rear area? If yes, the truck shape is clear. A perfectly square cargo box is not necessary.
Test the truck without turning it into a load test
Clear a short, flat path. Begin with the cargo area empty and give the chassis a gentle push. Watch for pieces that shift, lean, or brush a route marker. This is a handling check for the family's design, not a test of speed, strength, capacity, or durability.
If the empty truck feels awkward to move, revise before adding even a paper parcel:
- Lower the cab roof.
- Remove one cargo-wall tile.
- Widen the route by moving flat markers apart.
- Recenter a piece that looks offset.
- Open the back of the cargo area.
- Return an extra decoration to the parts basket.
Roll the revised truck over the same short path. One change at a time makes it easier for children to notice what helped.
If the empty model rolls comfortably and the child wants a physical delivery, add one very light paper parcel. Move slowly from depot to stop. If any tile shifts, park, remove the parcel, and simplify the body. Do not keep adding items to find a maximum. The useful result is a truck that supports the story, not a number on an imaginary cargo chart.
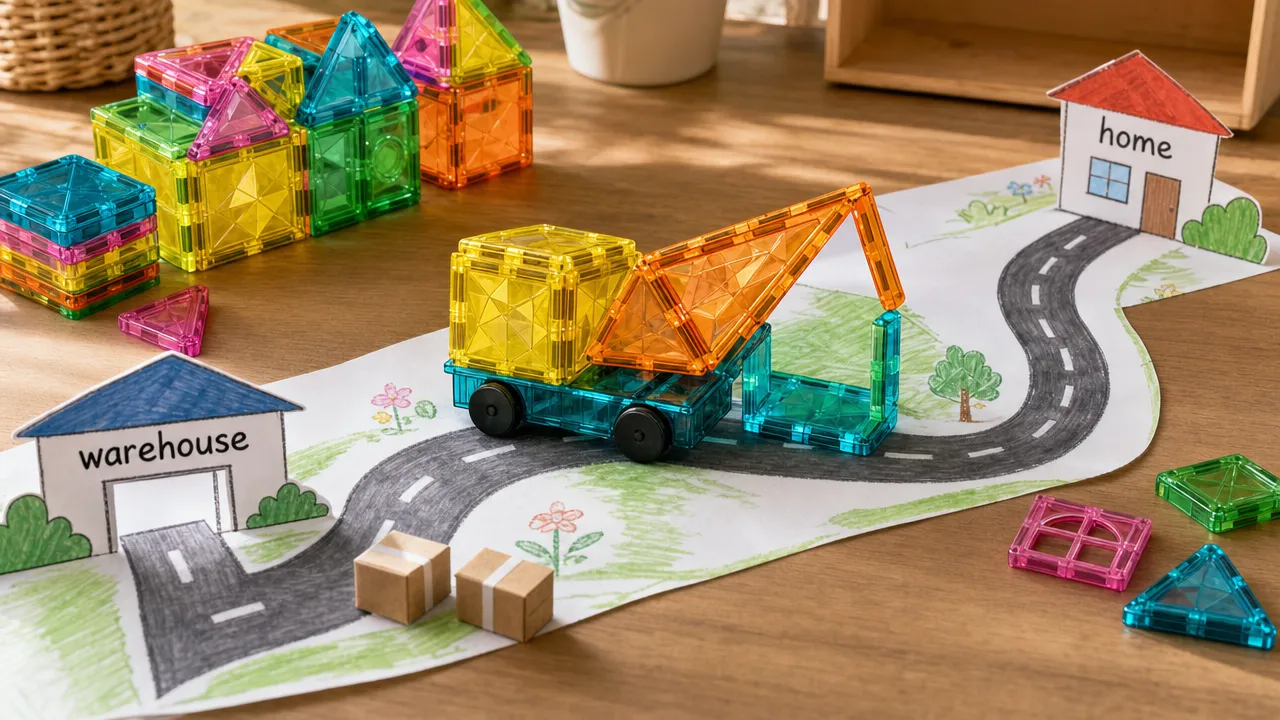
Run a delivery route that fits the room
A route needs a starting point, a destination, and somewhere to park. Three flat tiles can provide all of that.
Place one tile at the depot, one at a shop or home, and one at the garage. Optional paper labels can name the stops, but they are not included with the set. Keep labels loose on the surface and away from wheels.
Then follow a simple sequence:
- Park at the depot.
- Name or place one lightweight pretend parcel.
- Move slowly to the delivery stop.
- Unload or announce the imaginary delivery.
- Return the empty truck to the garage.
Children often add a surprise stop. The delivery may need to visit the couch, a stuffed animal, or a very urgent blanket fort. Add one detour if space allows, but keep the route clear enough that the truck does not weave through loose pieces.
Make the story useful for sibling play
Give each child a role for one round:
- Truck builder: chooses one cab or cargo detail.
- Depot helper: prepares one optional paper parcel.
- Route planner: places two or three flat stops.
- Driver: moves the truck gently and parks it after delivery.
Rotate roles after the truck returns to the garage. If two children both want to drive, let the first handle the outbound trip and the second bring the truck home. The shared route has a natural turn-taking point without a timer beeping in the middle of the story.
Solve common truck-building snags
When the build starts demanding more hands than the family has available, simplify it.
| What is happening | What to try next |
|---|---|
| The cab hides the cargo area | Remove one cab layer or shorten the front. |
| A cargo wall falls during loading | Keep that side open or use fewer wall pieces. |
| The truck looks like a regular car | Make the rear area lower and visually separate from the cab. |
| The parcel keeps slipping out | Set the parcel beside the truck and deliver it in the story instead. |
| The route takes over the room | Use three nearby stops and return to the depot. |
| Pieces are running low | Preserve the cab, one rear boundary, and the single chassis. |
Adults can model calm revision by describing the problem without judging the build: "This wall moves when the parcel goes in. Should we open the side or make it lower?" That gives the child two workable choices and keeps the truck theirs.
Unload, park, and inspect the pieces
End at the garage. Remove optional parcels and household props first, then collect route markers. If the child wants a record of the design, take a quick photo before disassembly. Take the truck apart over the build zone, find the single chassis, and put it in its usual storage place.
Sort the tiles broadly rather than conducting a full inventory at the end of every play session. Squares and rectangles can go together, triangles in another group, and window or specialty pieces in a third. Check under the table, around the rug, and beside the sofa warehouse before closing the container.
Ages 3+. An adult should inspect pieces before play. Stop using any cracked, separated, or damaged piece, or any piece with an exposed or missing magnet. Keep magnet-containing pieces away from younger children. If magnet ingestion is suspected, seek immediate medical attention. The U.S. Consumer Product Safety Commission's magnet safety guidance provides additional information for families.
A good cargo truck does not need to carry much. A clear cab, a low pretend cargo area, and one successful trip are enough to turn a handful of tiles into a complete family activity - including the important final delivery back to the storage box.